
AI voice cloning has come leaps and bounds over the last couple of years. It can even be used in real time to impersonate a voice, and the results are very good! I figured I would test cloning a voice from a security perspective. If I were a malicious actor and I could impersonate a VIP, I could most likely trick a staff member into disclosing information or resetting a password. These kinds of attacks are already successful without the help of AI, but it would only make them more successful… right?
Let’s start with the basics. To clone a voice, you need to already have some audio of their voice—the more, the better. However, if you have less-than-ideal audio, there are some nifty tricks that can be used to expand it. Let’s start with those first!
Do you have data but not very much? That’s not a problem! (Setup guide at the bottom of the page.)
Thanks to a tool like Tortoise-TTS, we can feed it a single or multiple audio files to generate a baseline. This tool and the baseline audio can then be used to generate Text-to-Speech (TTS) with the baseline voice. Even better, it will generate five (5) different audio clips each time!
- Pitch: Slight shifts in vocal pitch (higher or lower).
- Rhythm: Variation in pacing or pauses between words.
- Inflection: Emphasis on different syllables or words.
- Energy: One clip may sound more enthusiastic while another sounds calmer.
For example, let’s use the following as the baseline – nothing else. It will sound like this:
Now lets use the tool to generate 5 more clips based on that baseline:

Boom! Done! We now have more audio. I’d suggest running this multiple times with lots of different wording to really expand both the amount and quality of the data. Tortoise-TTS only needs to be used if you need more audio than you already have, otherwise, you can skip straight to RVC-Project.
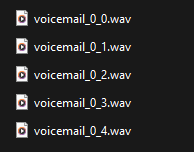
Here are two (2) of the five (5) samples. You can clearly hear the difference between the two!
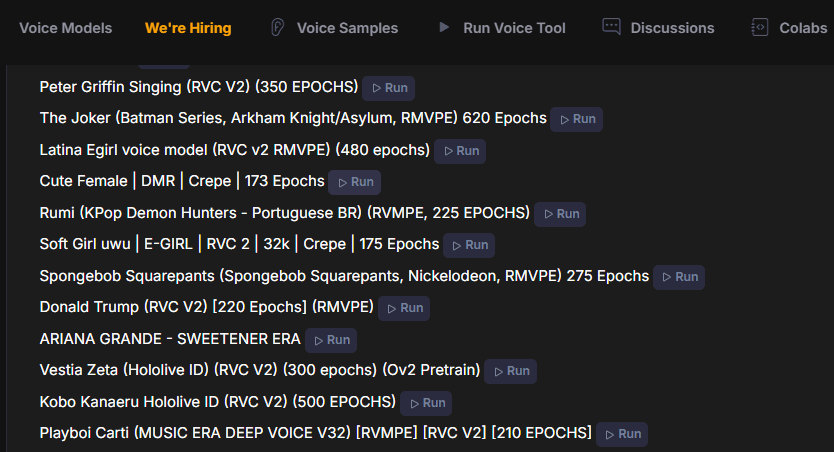
Once you have sufficient data, it’s time to train an AI model. I used this tool: Retrieval-based Voice Conversion WebUI – https://github.com/RVC-Project/Retrieval-based-Voice-Conversion-WebUI

This tool can be used for creating models, separating vocals from a background track, and using already-created models to convert audio. Rather than training from scratch, you can also download ready-made models from places like voice-models.com. That means someone else has already done the heavy lifting, and you can even perform real-time voice conversion.
I’ve generated a few models, and the results are quite good. The only caveat is that the quality is only as good as the quality of the input. If the source audio is unclear, short, or very monotone, the results will suffer. However, if you have around 10 minutes of expressive audio- with emotion, tone variation, and pitch differences-you should be in a good position. The longest I’ve trained on was about five (5) hours of audio, totaling roughly 2 GB of data, and shockingly, once trained, the model came out to about 50 GB!
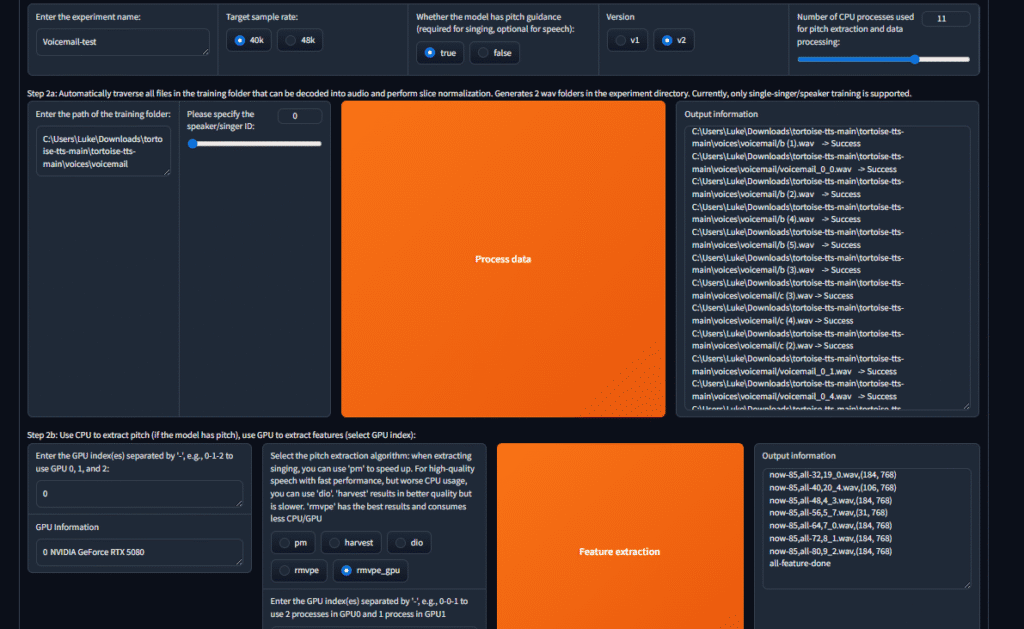
Below is the image of my voicemail-model being trained:
The result:
Pretty good if I do say so myself! Please note, this was created with 10 seconds of audio converted into 4 minutes of audio and then used to train an AI model. In an ideal scenario, you would have 30 minutes or more of real audio!
How to install and setup Retrieval-based-Voice-Conversion-WebUI? (Windows)
Ensure you install CUDA drivers if using an NVIDA GPU!
Also please note, if you’re usinf an NVIDA 50xx series graphics card like a 5080 / 5090, it’s going to be more finicky. Use this guide instead: https://bleekseeks.com/blog/how-to-run-rvc-webui-on-rtx-50-series-gpus-python-3-10-pytorch-2-7
1. Install Python 3.10
- Download Python 3.10 (Windows x64 installer) from: https://www.python.org/downloads/release/python-3100/
- Run the installer and tick “Add Python to PATH”.
- Click Install Now.
2. Clone the RVC WebUI Repository
- Clone the GitHub repo: https://github.com/RVC-Project/Retrieval-based-Voice-Conversion-WebUI.git
- Open Command Prompt and run:
cd Retrieval-based-Voice-Conversion-WebUI
3. Create a Virtual Environment
- Run: python -m venv rvc_env
- Activate it: rvc_env\Scripts\activate
4. Upgrade pip
- Run: python -m pip install –upgrade pip wheel
5. Install PyTorch
If you have an NVIDIA GPU (recommended for faster performance):
A. Install the NVIDIA GPU driver: https://www.nvidia.com/download/index.aspx
B. Install PyTorch with CUDA:
- Replace
cu121with your CUDA version (12.1 works for most). - Run:
pip uninstall torch torchvision torchaudio -y
pip install torch torchvision torchaudio –index-url https://download.pytorch.org/whl/cu121 - To check your CUDA version, run: nvidia-smi
If you don’t have a GPU or want CPU-only:
- Run:
pip uninstall torch torchvision torchaudio -y
pip install torch torchvision torchaudio –index-url https://download.pytorch.org/whl/cpu
6. Install RVC WebUI Requirements
- Run: pip install -r requirements.txt
7. Launch RVC WebUI
Start the WebUI: python infer-web.py
Activate your environment: rvc_env\Scripts\activate
How to use Retrieval-based-Voice-Conversion-WebUI?
- Training:
- Go to Train tab.
- Import clean WAV voice dataset (10–30 min is enough).
- Click process data, wait to finish
- Click feature extraction, wait to finish
- Click train model, wait to finish
- Click train feature index, wait to finish
- It will then generate a .pth file and a .pk; file
- These files can then be used on the interence model
- Extract features → Extract pitch (use RMVPE) → Train → Build Index → Export
.pth.
- Inference:
- Select your
.pthmodel and.indexfile.- Note – .index file might be index.pkl file instead. When selecting the path, just use the overall folder location: C:\Users\XXXXX\Retrieval-based-Voice-Conversion-WebUI-main\logs\NEW_Scott\3_feature768 and not \index.pkl
- Choose RMVPE for F0.
- Convert your voice audio to the target voice.
- Select your
How to install and setup Tortiose-TTS? (Windows)
Ensure you install CUDA drivers if using an NVIDA GPU!
Tortoise TTS only needs to be used if you don’t have much audio to begin with. In hopefully most cases, this won’t be required.
Tortoise TTS works best with Python 3.10, and you can speed it up a lot using your NVIDIA GPU with CUDA. Instructions are below but if you need other versions for linux or different GPUs follow: https://github.com/neonbjb/tortoise-tts
Install Python 3.10
1. Install Python 3.10
- Download Python 3.10 (Windows x64 installer) from: https://www.python.org/downloads/release/python-3100/
- Run the installer and tick “Add Python 3.10 to PATH”.
- Click Install Now.
2. Open Command Prompt
- Press Windows + R, type
cmd, and press Enter.
3. Create a Virtual Environment
- Run: python -m venv tortoise_env
- Activate it: tortoise_env\Scripts\activate
4. Upgrade pip
- Run: python -m pip install –upgrade pip
5. Install Tortoise TTS
- Run: pip install tortoise-tts
6. (Optional but Recommended) Enable GPU Acceleration with CUDA
A. Install NVIDIA GPU Driver
- Download and install the latest driver for your GPU: https://www.nvidia.com/download/index.aspx
B. Install PyTorch with CUDA
- Replace
cu118with your CUDA version (11.8 is common). - Run:
pip uninstall torch torchvision torchaudio -y
pip install torch torchvision torchaudio –index-url https://download.pytorch.org/whl/cu118 - If you’re unsure of your CUDA version, run: nvidia-smi
C. Test CUDA in Python
- Open Python and run:
import torch
print(torch.cuda.is_available()) - If it prints “True” — CUDA is working, and you’re ready to use Tortoise TTS with GPU acceleration.
Congrats! It’s now installed.
Next, we need to create a folder within C:\Users\XXXXX\Downloads\tortoise-tts-main\tortoise-tts-main\tortoise\voices
and then place our baseline audio file within like the following:

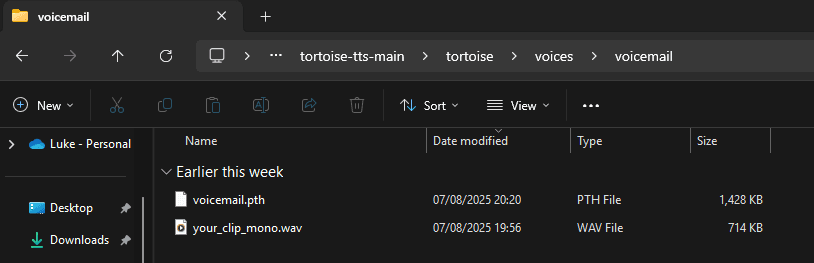
Ignore the .pth file for now.
How to use tortoise-TTS?
python tortoise/do_tts.py --text "this is a text" --voice voicemail --preset fast --candidates 5
–voice voicemail should be the name of your folder you created.
–Candidates 5 will be how many audio files it will generate with varying tones, pitches, emotions etc.
You will then see something like this in your terminal:

Once completed, the new audio file will be generated here:
C:\Users\XXXXX\Downloads\tortoise-tts-main\tortoise-tts-main\results
Each time you run tortoise in future, you will need to open terminal and change directory to the tortoise folder then run tortoise_env\Scripts\activate this will bring you back into your virtual enviroment. You can then run python tortoise/do_tts.py --text "this is a text" --voice voicemail --preset fast --candidates 5